How to use Zendesk Sell – The Ultimate Guide for 2025
Introduction
Sales professionals everywhere are increasingly dealing with more data, more communication channels, and higher buyer expectations. If you’re looking for a CRM solution that balances simplicity with power—and folds neatly into broader customer engagement strategies— Zendesk Sell (previously known as Base) might be the missing piece in your tech stack.
This guide is your in-depth primer on mastering Zendesk Sell. We’ll cover everything from initial setup and pipeline configuration to advanced tips on analytics and team collaboration. And if you’re looking to save time by pulling LinkedIn data into your CRM, we’ll also introduce you to LinkZen, a convenient extension that connects your favorite professional network to Zendesk Sell at the click of a button.
By the time you’re done reading, you’ll know how to:
- Configure leads, contacts, and deals in ways that reflect your unique sales process.
- Seamlessly import existing data to get your pipeline off the ground.
- Track every conversation, call, email, and note in one place.
- Unify your sales and support data for a 360° customer view.
- Build robust analytics dashboards to forecast revenue, measure rep performance, and more.
Ready to unlock your next level of efficiency and performance in sales? Let’s dive in.
Table of Contents
- Why Zendesk Sell?
- Getting Started: Basic Setup and User Management
- Connecting Your Email, Calendar, and Integrations
- Leads, Contacts, and Deals: The Heart of Zendesk Sell
- Custom Fields, Pipelines, and Teamwork
- Importing Your Data
- How LinkZen Boosts Your Lead Generation
- Managing Activities, Tasks, and Calls
- Reporting, Analytics, and Forecasting
- Best Practices for Teams and Territories
- Unifying Sales and Support
- Mobile Selling and On-the-Go Engagement
- Advanced Tips and Tricks
- Conclusion and Next Steps
1. Why Zendesk Sell?
Zendesk Sell is designed for modern sales teams juggling multiple communication channels and collaboration demands. Whether you’re a small startup seeking something user-friendly or a larger enterprise wanting advanced data insights, Sell offers:
- Unified Data: Connect with Zendesk Support for a cohesive view of each prospect or customer, bridging the gap between sales and service.
- Modern UI: Minimal, user-friendly design reduces data-entry friction so reps can focus on selling, not wrestling with software.
- Built-In Enrichment: Tools like Reach (an optional add-on) let you discover and enrich new leads without leaving your CRM.
- Scalable Analytics: Generate dashboards that capture the entire funnel, from leads to close, enabling real-time visibility into rep performance.
- Straightforward Setup: Out-of-the-box email integration, pipeline customization, and contact importing ensure a swift go-live.
For teams tired of overly complex CRMs that feel more like databases than sales catalysts, Zendesk Sell aims to strike a sweet balance of power, usability, and integrated synergy with the rest of your customer engagement operations.
2. Getting Started: Basic Setup and User Management
Signing Up
If you haven’t already, the easiest way to check out Zendesk Sell is by starting a free 14-day trial. Simply visit the Zendesk Sell website, fill out your info, and jump right in. If you’re using other Zendesk products (like Support), you can access Sell from the product tray in the top-right corner once you’ve activated your trial or license.
Basic Profile and Roles
After logging in, you’ll land on the main Sell interface, featuring your dashboard and navigation icons for leads, contacts, deals, calendar, tasks, and reports. But before you leap into pipeline building, consider the following housekeeping:
- Profile Settings: Update your name, position, email, and any relevant details in the top-right avatar menu.
- User Management: Go to Settings → Manage → Users to invite team members.
- User Roles: Assign roles such as Admin, Sales Manager, or Standard Rep. You can create custom roles for nuanced permission levels—for instance, an SDR role with limited pipeline editing or a Customer Success role for post-sale relationship building.
Best Practices for Teams
- Promote Collaboration: Encourage reps to mention each other in notes via the “@” symbol. For instance, “@alex Please check on the latest proposal doc.”
- Set Ownership Carefully: If your pipeline uses territory assignments, ensure the right reps own the right leads by territory or region.
3. Connecting Your Email, Calendar, and Integrations
Email Integration
From day one, connecting your inbox ensures every sent and received email to a contact or lead is automatically logged in Zendesk Sell.
- Go to Settings → Communication Channels → Email.
- Choose Your Provider: Google Workspace, Outlook, or a generic IMAP/SMTP.
- Set Permissions: Decide if you want all emails to sync or only those you link to existing leads/contacts.
Benefits:
- Automatic call logging and email tracking means your timeline remains up to date.
- Real-time notifications appear if prospects open your email or click on links (depending on your plan).
Calendar Sync
Keeping your appointments on the same page as your deals fosters better scheduling discipline:
- Go to Settings → Communication Channels → Calendar.
- Select Calendar Service: Google or Microsoft 365 are common picks.
- Authorize: Accept the permission requests, then watch your events sync.
Pro Tip: If you prefer Apple calendar, consider syncing Apple → Google → Sell, or Apple → Microsoft 365 → Sell as a two-step approach.
Additional Integrations
Zendesk Sell also supports an array of marketplace apps. For example:
- Mailchimp: Sync contact lists or track campaign results.
- Pandadoc: Automate e-signatures and proposals.
- SMS Tools: Log text messaging activity for quick updates to leads and contacts.
To explore more, head to Settings → Integrations or check out Zendesk’s Marketplace to filter for “Sell.”
4. Leads, Contacts, and Deals: The Heart of Zendesk Sell
A fundamental concept in Zendesk Sell is how it separates Leads, Contacts, and Deals:
- Leads: Potential prospects not yet qualified. You might have minimal info or be testing the waters to see if they’re a good fit.
- Contacts: Qualified individuals or organizations you’ve confirmed are relevant prospects—or paying customers with potential upsell.
- Deals: An opportunity record that represents a specific sale or arrangement in progress.
Qualifying Leads
You can store unvetted prospects in Leads to keep them separate from your main pipeline. For example, inbound form fill-outs or event signups can go here. If a lead shows real promise, use the Convert button to create a Contact (and optionally a Deal right away).
When to Convert a Lead:
- You’ve scheduled a demo.
- They have an indicated budget and timeline.
- You validated they’re a genuine buyer, not just requesting info.
5. Custom Fields, Pipelines, and Teamwork
Custom Fields
Out of the box, Zendesk Sell provides standard fields (like email, phone, address, deal value, etc.). But your business likely has unique data needs:
- Industry Type: So you can segment deals by vertical.
- Contract Start/End Dates: Handy for recurring or subscription-based businesses.
- Priority Score: Or a lead rating system that helps reps see who’s hottest at a glance.
Creating Custom Fields:
- Go to Settings → Customize → Contacts, Leads, or Deals.
- Add Field: Text, Dropdown, Date, Number, Checkbox, etc.
- Optionally mark it as Required at certain pipeline stages or lead qualification.
These fields then appear on record pages (like a contact profile), ensuring consistent data capture across the team.
Pipeline Setup
Pipeline Stages reflect your sales journey. For example:
- New: Freshly qualified deal.
- Discovery: You’re learning the prospect’s goals/budget.
- Demo: Product or service demonstration.
- Proposal: Sending quotes and negotiating.
- Closed Won: Sealing the deal.
- Closed Lost: Negotiation ended without success.
Editing Your Pipeline:
- Go to Settings → Customize → Sales Pipelines.
- Rename stages or add new stages (like “Legal Review”).
- Set Weighted Probabilities (e.g., “Discovery = 20% chance to close”). This helps forecasting dashboards gauge the revenue likely to come in.
Team Collaboration
Zendesk Sell encourages cross-rep synergy:
- Collaborators: You can add collaborators to leads, contacts, or deals if multiple roles are working the same opportunity (like a Solutions Engineer plus a Sales Rep).
- @Mentions: “@UserName” in a note to ping them.
- Permissions: Use Roles to restrict or grant high-level access (like editing pipeline stages or viewing all deals).
6. Importing Your Data
Bringing in existing lead/contact records is vital for a fast launch. If you’re migrating from spreadsheets or another CRM, consider these steps:
- Clean Up: Consolidate duplicates, verify emails, unify phone formats.
- Map Fields: For instance, your “Prospect Budget” column might map to a custom field in Sell.
- Import: Go to Settings → Data → Import, choose CSV or direct integration, then map columns.
Need more help? Check out How to Import Contacts into Zendesk Sell for a thorough walkthrough, including best practices around custom fields.
Bulk Updates: Once your data is imported, you can do mass edits via Smart Lists. For instance, filter “all leads from last quarter who never responded” and apply a bulk change to reassign them to a different rep or update a life-cycle stage.
7. How LinkZen Boosts Your Lead Generation
LinkZen is a Chrome extension built to sync LinkedIn profiles into Zendesk Sell with a single click. If you source prospects on LinkedIn or rely heavily on social selling, LinkZen is a major productivity booster.
Key Benefits
- No More Copy-Paste: Grab name, job title, company, and other relevant fields at once.
- Accuracy: Reduces data-entry mistakes.
- Faster Prospecting: Build your leads list without toggling between multiple tabs and tools.
Check out LinkZen to see how you can supercharge your lead collection from LinkedIn to Zendesk Sell in seconds.
8. Managing Activities, Tasks, and Calls
Activities in Zendesk Sell refer to the logged interactions that keep deals moving: calls, emails, texts, appointments, visits, and tasks.
Task Player
The Task Player is a built-in productivity hack. Once you create tasks (like “Follow up with John next Tuesday,” “Send product sheet to Mary,” etc.), you can queue them up. Hitting Play cycles through tasks automatically so you can:
- Open the relevant lead or deal.
- Complete the to-do item.
- Move to the next one without returning to your main tasks page.
No more rummaging through spreadsheets or forgetting half your tasks after lunch. It keeps your day structured and action-oriented.
Call Logging
With Zendesk Sell Voice or a third-party phone integration:
- Automatic Call Logging: Each call is recorded as an activity, capturing duration, call outcome, and any notes.
- Power Dialer: Build a call list from a Smart List of high-priority leads. Then let Sell dial them sequentially so you can focus on the conversation, not the phone number.
Tip: Don’t forget to label calls as “Connected,” “Left Voicemail,” or “No Answer” to maintain accurate stats for pipeline tracking and rep performance.
9. Reporting, Analytics, and Forecasting
Pre-Built Dashboards
Right out of the box, Sell provides pre-made dashboards to see:
- Deal Performance: Summaries of your total pipeline value, close rates, and rotting deals.
- Lead Stats: Conversion rates, days to convert, lead sources, etc.
- Call Analytics: For teams using Voice or integrated calling.
- Activity Trends: Track the volume of tasks, emails, and visits your reps log over time.
The top of each dashboard often features filter bars (like deal owner, time range, pipeline). Tweak those to quickly see how performance differs by team or quarter.
Custom Dashboards in Explore
Looking for advanced data slicing? Explore is Zendesk’s analytics platform. With Sell data inside Explore, you can:
- Mix and Match Metrics: For instance, show average time to deal close by rep, or pipeline stage velocity.
- Custom Calculations: Build formulas like average contract length or % of expansions vs. new deals.
- Share or Schedule: Export to CSV, email a PDF to managers monthly, or set up automated snapshots.
For more details, see How to Find Your API Key in Zendesk Sell if you’re building heavier integrations or hooking third-party BI tools into your Sell data.
Forecasting
If you set probabilities for each pipeline stage, your forecast charts display the weighted revenue. For instance, if a $10,000 deal is in a stage with a 40% close likelihood, that’s counted as $4,000 in your forecast. This real-time forecasting updates whenever deals move stage.
10. Best Practices for Teams and Territories
For larger organizations, you may need robust ways to segment deals or auto-assign leads:
- Territories: Divide leads by region, product line, or business unit. This ensures reps only see relevant records, and managers can track region-specific performance.
- Auto-Assignment Rules: If leads come from web forms or chat, set rules to assign them to the correct rep in a round-robin or territory-based approach.
Examples:
- “All inbound leads from EMEA territory → Owned by Alice.”
- “Leads from the Enterprise form → Owned by the Enterprise Sales Team in round-robin rotation.”
11. Unifying Sales and Support
A big advantage of Zendesk Sell is easy synergy with Zendesk Support:
- No Lost Conversation: Reps can see open support tickets for their contacts without leaving Sell.
- Open/Update Support Tickets: A rep can create or escalate a service ticket if the prospect has a usage question.
- Team Visibility: Support agents see top-level details from Sell, such as the deal amount or next steps, so they’re aware of ongoing sales activities.
How to Activate: Go to Settings → Integrations. Find the Zendesk Support tile. Once connected, you’ll see a new “Tickets” panel on lead/contact/deal pages in Sell.
The result? A frictionless buyer experience, as your entire organization is aware of every conversation, from pre-sale to renewal.
12. Mobile Selling and On-the-Go Engagement
For field reps or anyone who can’t stay chained to a desk, the Zendesk Sell Mobile App for iOS and Android offers:
- Visit Tracking: Geotag and log site visits.
- Automatic Call Logging: Make calls from your phone’s dialer, sync them back to Sell.
- Offline Access: Perfect for flights, remote areas, or job sites with shaky Wi-Fi.
- Push Notifications: Stay alerted when a high-priority contact opens an email or moves stages.
Proximity Searches let you see which leads or contacts are nearby, so you can cluster appointments in the same area. If you’re an outside salesperson frequently traveling or scheduling in-person visits, it’s a major perk.
13. Advanced Tips and Tricks
1. Smart Lists and Bulk Actions
- Segment leads/contacts by last engagement, industry, or any custom field.
- Bulk Email or Bulk Task creation to keep your outreach timely.
- Saved Views: Keep your favorite filters around. For instance, “Deals Closing This Month” or “Stalled Deals Over 30 Days.”
2. Sequences and Automation
Sell Sequences (with the optional add-on) let you create multi-step cadences:
- Day 1: Send intro email.
- Day 3: Auto-create “Call Attempt” task.
- Day 5: Follow-up email if no reply.
Reps can enroll leads or contacts into these sequences for consistent follow-up, letting them handle more outreach with minimal manual overhead.
3. Integrated Chat for Real-Time Engagement
If your website has Zendesk Chat, you can unify it with Sell:
- Log Chat Interactions: Convert chat visitors to leads in one click.
- Topics: Route inbound chat inquiries to specific teams (e.g., “Billing” vs. “New Inquiries”).
This helps you catch brand-new leads who come through chat and quickly spin them up in Sell.
4. Social Media Prospecting
- Beyond LinkZen for LinkedIn, you can use similar browser add-ons or Zaps to snag data from other social channels.
- Ensure compliance: Always gather leads ethically. Respect opt-outs and email unsubscribes.
5. Minimizing Spam Risk
Nothing kills momentum like your domain or IP address getting flagged. If you do bulk emailing:
- Configure SPF/DKIM records.
- Personalize the body and subject lines.
- Use double opt-in or an unsubscribe link to respect leads’ preferences.
Check the Zendesk Sell help center for exact steps on avoiding spam pitfalls.
14. Conclusion and Next Steps
Zendesk Sell stands out for its combination of intuitive design, robust features, and tight integration with the Zendesk ecosystem. By mapping your processes—qualifying leads, customizing fields, and setting up pipelines—then layering on powerful analytics and synergy with support, you gain an end-to-end vantage on each customer’s lifecycle.
Recap of Action Steps
- Set Up: Configure roles, user permissions, and custom fields for your unique workflow.
- Connect Data: Plug in your email, calendar, and consider third-party tools or LinkZen for easier lead capture.
- Build Pipelines: Define stages with clear entry and exit criteria, then explore forecasting features.
- Import or Migrate: If you’re new to Sell, import your existing leads using CSV or read:
- Set Up Analytics: Create custom or pre-built dashboards in Explore for pipeline health, rep performance, and monthly revenue forecasts. For integration keys, see:
- Refine: Use Task Player, Sequences, and custom triggers to keep deals moving swiftly.
- Sync with Support: Let reps see tickets, create tickets, or track expansions from the same interface if you also use Zendesk Support.
Final Call to Action
Feel ready to transform your sales process? Don’t let fresh leads slip away. Set up your pipeline, sync your inbox, and harness robust analytics for a proactive, data-driven approach. And if you’re active on LinkedIn, give LinkZen a spin—it’s the streamlined way to port new connections right into Zendesk Sell, helping you stay on top of valuable relationships.
Ready to Get Started?
- How to Import Contacts into Zendesk Sell
- How to Find Your API Key in Zendesk Sell
- LinkZen: Integrate LinkedIn with Zendesk Sell in One Click
Take your pick of next steps, sign up for a trial, or open up your existing environment to fine-tune your setup. In no time, you’ll harness a smoother, more engaging, and ultimately more successful sales operation—backed by the rich capabilities of Zendesk Sell.
Happy selling and see you at the top of your leaderboard!
Stop doing Zendesk Sell data entry.
Save 4hrs / week doing Zendesk Sell Data Entry.
Add from LinkedIn to Zendesk Sell in 1 Click!
Sync from LinkedIn to Zendesk Sell in 1 click.
Save 4hrs / week with the #1 LinkedIn Integration for Zendesk Sell.
Trusted by thousands of SDRs, BDRs, Sales Ops, Team Leads & more
Supporting 50+ CRMs, including:
LinkZen is the #1 LinkedIn Integration for Zendesk Sell.
No more tab switching.
- Add to Zendesk Sell in 1-click.
- Manage your CRM from inside LinkedIn.
- Save hours per week.
Find verified emails.
- Find verified email addresses from LinkedIn profiles.
- All emails are verified in real time (96% accurate).
- Stop copy and pasting between multiple tools.
Save 4hrs per week.
- Access the CRM contact directly inside LinkedIn.
- See which people are already in your CRM.
- Your CRM & LinkedIn working in complete harmony.
Get verified email addresses from LinkedIn profiles.
We combine multiple databases (e.g., Apollo, Hunter, etc.) and verify every email in real time to achieve 96% accuracy!
Get started in 3 easy steps...
Install Chrome Extension
Once you've installed the extension from the Google Web Store you can sign up and then link your CRM API keys (2 mins).
Go to a LinkedIn Profile
When you visit a person's LinkedIn profile an "Add to CRM" button will automatically appear below their profile photo.
Click "Add to CRM"...
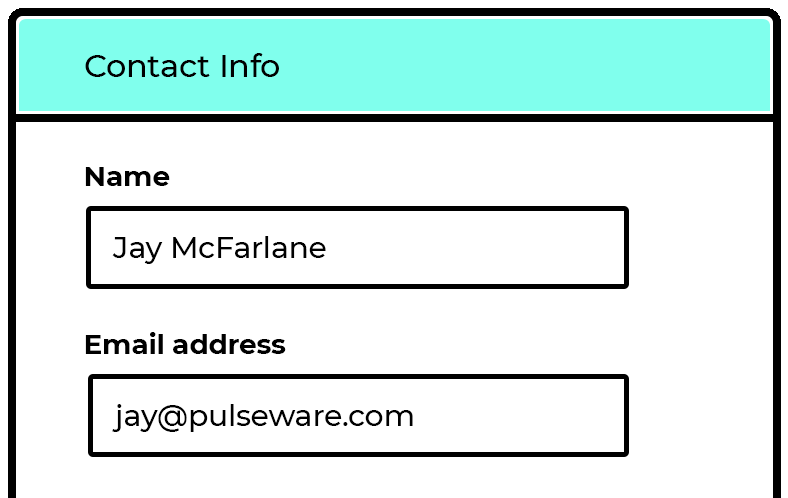
A form will popup containing their name, email, company etc... and with 1 more click - they are added to your CRM!
What our users say...
Product Walkthrough
We'll show you in the next 2 minutes, how you could save 4hrs/week:
FAQs
LinkZen allow you to quickly add leads / contacts into your CRM from inside the LinkedIn website. You’ll see an “Add to Zendesk Sell” button on all LinkedIn profiles which, when clicked, fetches all the relevant information for the person (including name, verified email address, company, job title etc). With one more click, you can save this person to your CRM – saving you hours on data entry per week. The extension also allows you to jump directly to the person’s record in Zendesk Sell if they already exist.
Yes, we capture and sync email addresses from LinkedIn profiles when available. We use 5 different premium data vendors (e.g. Apollo, Hunter etc) to get the most accurate and up-to-date contact information. All emails are also verified in real time, ensuring they are deliverable. Over 96% of our fetched emails were valid in 2023 – one of the best rates in the industry.
Yes, all of our integrations are fully GDPR compliant. We ensure that all data captured and transferred complies with GDPR regulations, safeguarding your customers’ privacy and handling their personal information responsibly. For more information, please see our data processing addendum and privacy policy.
No, our integrations works with a standard LinkedIn account, so you don’t need to purchase Sales Navigator or LinkedIn Recruiter. While those premium tools offer additional features, our integrations allow you to capture contact details from any LinkedIn profile, regardless of your subscription level.
Save 4hrs / week on CRM data entry.
Sync prospects from LinkedIn into your CRM in 1-click. Stop doing data entry.